0
$0.00
0 items
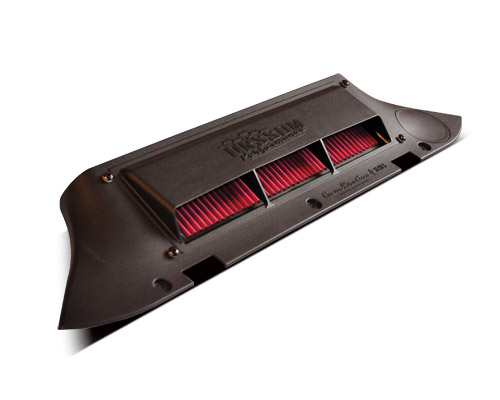
GenAiration 4 Alloytec V6 Series intake suites, Holden Commodore VE V6 SSV / Calais / Omega with 3.6L Alloytec engine (Year model 2006 to 5 / 2009).
Please note: For overseas or international sales (outside Australia) please contact us for pricing.
$595.00
GenAiration 4 Alloytec V6 Series intake to suit Holden VE V6 SSV / Calais / Omega with 3.6L Alloytec engine (Year model 2006 to 5 / 2009).
POWER, PERFORMANCE & ECONOMY is what is achieved by installing one of these V6 Orssom Performance Cold Air Intakes.
Due to overwhelming sales and popularity of this Orssom Performance Cold Air Intake (Aust reg design No: 315677) to keep up with demand we have recently started manufacturing these intakes out of Injected Plastic. Orssom Performance products are NOT Vacuum formed or Rotational moulded like most cheaper intakes in today's market, which use recycled plastic. Our products are made from Factory OEM plastic material similar to whats found on other plastic components under you bonnet. Those cheaper products within time, will not stand up to the under bonnet temperatures resulting in Cracking / Distorting, Air filters falling out of them and finally, find there way in the rubbish bin. "No wonder it's the VE Holden owner's most popular choice when it comes to Over The Radiator Cold Air Intakes".
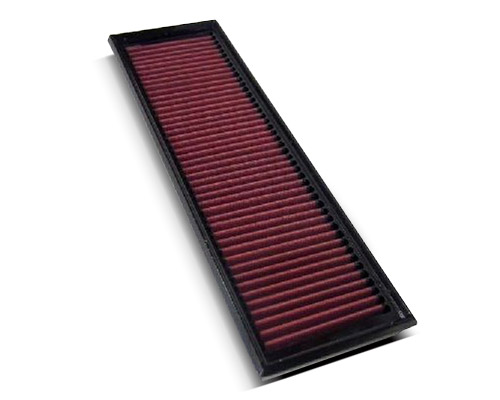
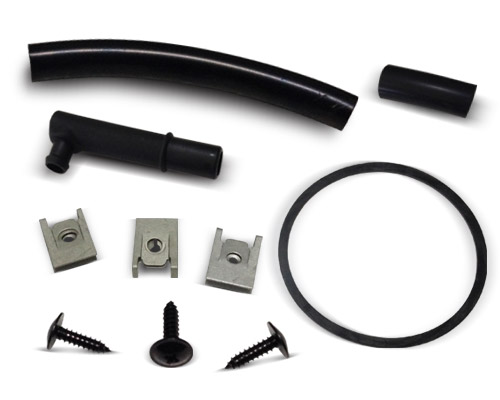
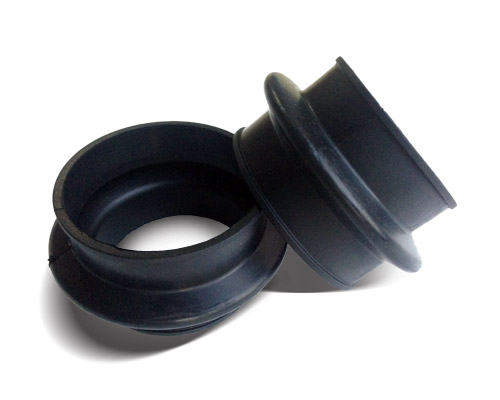
What you get in this OTR Kit:
This kit does not include the Airflow Sensor, you MUST use your original factory unit - click here to view correct sensor
The benefits of the "Orssom Performance" intake over our competitors are:
Don't let the sleek, Factory appearance of the intake fool you!!! Immediately upon installing the intake, you will notice the instant throttle response and smoothness in acceleration. You will also notice, you don't have to accelerate as far to get you to the speed you where traveling prior to fitting the intake. Under hard acceleration the intake gives a nice Deep, Throaty Induction sound, just enough to let the guy at the set of lights next to you, know that you have some serious business under the bonnet.
Extensive Research and Development has gone into designing these Orssom Performance Over The Radiator Cold Air Intakes. Be it on Road testing, Track or on the Dyno the following are Major proven factors that will be achieved when fitting an Orssom Performance OTRCAI to your vehicle.
Installation: The intake can be installed in around 30 minutes, with the aid of: 7mm & 10mm socket and ratchet, Phillips head and straight blade screw driver, Sharp knife or razor blade to trim the hood seal (Easy to follow fitting instructions come in the kit).
Warranty: Orssom Performance products are backed by a 12 months Manufacturers Replacement Warranty from purchase date, against faulty manufacturing (Failure to follow fitting instructions procedure will void warranty).
Disclaimer: Orssom Performance Products are designed for off road use only. CAI Pty LTD & Conrod Motorsport Pty Ltd T/A Orssom Performance, accept no responsibility nor will be held liable for any damages caused to Vehicle engines / Vehicles / Property / Lose of life / Injury or Injury to others, as a result of fitment of these products. Please consider carefully if this product is for you before purchasing.
On the Street:
On the Strip:
Please note: For overseas or international sales (outside Australia) please contact us for pricing.
Most owners complete the DIY install in about 30 minutes using basic hand tools: 7 mm & 10 mm sockets/ratchet, Phillips and flat screwdrivers, and a sharp knife to lightly trim the bonnet/hood seal as per the instructions. The design is genuinely bolt-on, no removing the bar, no cutting panels, and no wiring extensions.
A custom tune is recommended to maximise drivability and power, especially on cars that are more sensitive to airflow changes. If your engine light appears after installation, that doesn’t mean something’s broken; it can simply indicate the ECU has detected increased airflow outside its stock parameters. Follow the checklist (fuel quality, ECU reset, relearn drive) and, if the light remains, book a tune to align fueling with the new airflow.
It’s not common, but it can happen on some vehicles as the ECU adapts to the additional airflow. First, ensure the MAF seal is seated correctly and there are no air leaks. Then: 1) Avoid E10 and fill with 95 or 98 octane, 2) disconnect the battery ~15 minutes to reset the ECU, and 3) complete a 300–500 km relearn drive. If the light persists, a custom tune will sort it.
No. This VE V6 Orssom intake specifically avoids the headaches, no laying back (tilting) the radiator, no cutting body panels, no wiring extensions, no bumper removal just to service the filter. It’s a straightforward, reversible install designed to look OEM once fitted.
Orssom intakes for the VE range are manufactured from injection-moulded, OEM-grade plastic, not vacuum-formed or rotationally moulded like cheaper alternatives. That delivers precise fitment, durability under bonnet heat, and a clean, factory-style finish that lasts. A 12-month manufacturer replacement warranty underscores the build quality.
For this VE V6 Alloytec kit, an infill panel isn’t required and isn’t part of the standard contents. Some other Orssom listings (e.g., certain SIDI/V8 packages) are offered as combo kits with an infill panel to complete the engine-bay presentation, handy if you’re building a matched look across models. Check the specific kit contents on the product listing you’re buying.
Yes, Pontiac G8 LY7 (2008–2009) owners in LHD markets run an Orssom OTR specific to that model, with similar install and MAF retention. If you’re outside Australia (e.g., US, Middle East, UK), choose the listing that matches your vehicle (G8, Lumina, VXR8, etc.) and engine.
For best performance and to minimise false EML triggers, avoid E10 and use 95 or 98 RON petrol. This is especially helpful during the ECU’s relearn period after fitting the intake and any exhaust upgrades.

GenAiration 4 Series VE V6 OTRCAI
Registered Design No: 329032
SUITS: HOLDEN VE V6 COMMODORE
Fitted with 3.6L Alloytec Engine 2006 to 3 / 2009
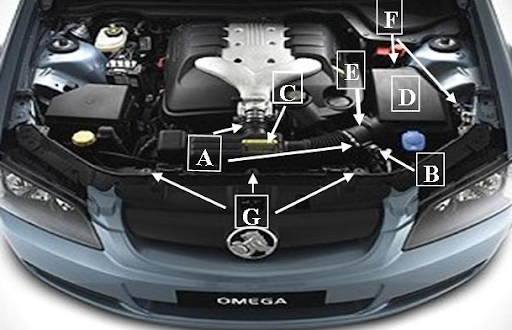
[Engine bay photo with callouts A, B, C, D, E, F, G]
GenAiration Series OTRCAI — Orssom Performance
Installing the Cold Air Intake
This intake is designed to be used with the Factory Air Flow Meter (AFM)
Step 1: Removal of Factory air box assembly
Note: The rear of the lower air box may be a bit tight to get past the battery terminal. Remove the inner rubber grommet for a bit more clearance.
Step 2:
Step 3: Important
Cut or remove hood seal as shown in Diagram 4. Failure to do so may cause engine to overheat resulting in engine failure.
Start Vehicle
Let idle for a few minutes so the computer can start to re-learn new values. Vehicle may take up 500km’s to calibrate to new values.
Note: DO NOT spray any lubricants such as WD40 onto rubber bellows
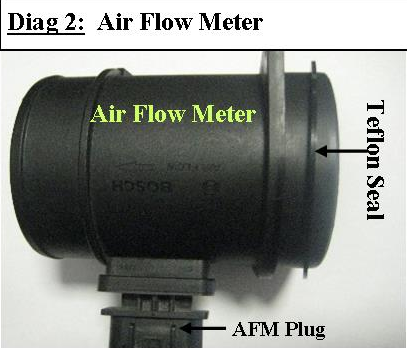
Labels: Air Flow Meter; Teflon Seal; AFM Plug
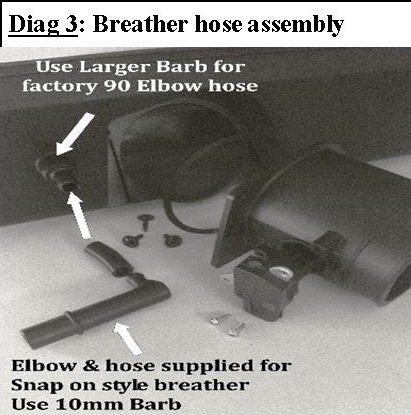
Use Larger Barb for factory 90 Elbow hose
Elbow & hose supplied for Snap on style breather
Use 10mm Barb
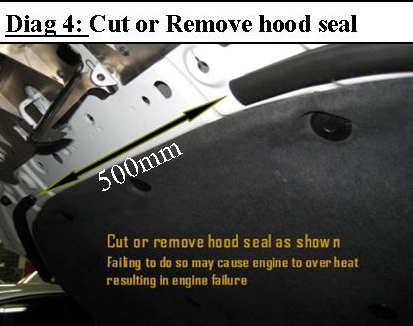
500mm
Cut or remove hood seal as shown
Failing to do so may cause engine to over heat resulting in engine failure.